Showing posts with label Jamaica. Show all posts

Friday, October 17, 2014

What to Keep in Your Desk Drawer


We all know it, it pays to be prepared especially on those days when just about everything is going wrong. After a particularly fail-worthy day at the office I created a checklist in my head of things I should keep in my desk at my office for those days when it is absolutely impractical to go home. I've divided the list into two sections - Essentials and Add-Ons. If I've left off something be sure to let me know and I can add it to the list. Here We go:

Essentials


  • Chargers : Because duh... you don't want your phone or your tablet to die. This is your only way of contacting the outside world, and is the 'essentialest' of essentials
  • Hygiene Kit: This is a small pouch and should include toothpaste and toothbrush, deodorant, and a small rag. If you are a lady, include a few panty liners & sanitary napkins. Some persons also carry an extra pair of underwear but I don't feel too comfortable having panties in my drawer at work but to each his own.
  • First Aid Kit: because accidents happen and nobody wants to touch your blood. #justsaying;
  • Sewing Kit : You don't actually have to know how to sew. This can include things like dressmaker's tape to easily fix a loose hem; safety pins for broken zippers and extra buttons if you do know how to sew;
  • Light Snacks: If you get hangry, please spare your co-workers and keep something in your desk to reach for when the day runs longer than you think it will;


Add- Ons


  • Headphones: not everyone shares your taste in music and they shouldn't be subjected to old school whatever it is that keeps you awake;
  • Lint roller: unless you like it when that cute co-worker tries to brush off your fuzzies. (Naughty naughty!)
  • Handheld Mirror & Brush : If you play with your hair, you may want to take a look at it before you get up from your desk to report to your boss;
  • Umbrella : cuz rain...duh
  • Extra pair of shoes: Your heel could break, the sole could come off, you could have tracked through mud to get into the office or you could want a break from your heels. Please do not bring flip flops - flats are always a better more professional option - you aren't at home.

What do you need to have at work to function properly? Leave me a comment and let me know!

'Til later,
*Jane


Thursday, July 3, 2014

DIY Cushion Covers


I'm on a mission to redecorate my house without spending a bag of money. What this really means is that I have been spending hours upon hours scouring Pinterest and Google search for inspiration and tutorials. I've become so engrossed with it, I've been actually having dreams about what I want to do so I figured that instead of just annoying my friends and family with random pics and questions about tools and installation methods, I would share my experiments here. 

If you're as into decor as I am, *high five sister!* If not, I have hundreds of other posts on other topics I promise. So now let's get into it.

I went looking for material to recover my couch cushions because I was changing the colour scheme of my living room. I am yet to find something I love, things that were similar were very expensive at over $600 a yard and for something I would be looking at everyday I didn't think that was a fair trade off.

So, I dug through my two suitcases of unused fabric I've been hoarding saving for the future and found a plain white cotton - the possibilities alone made me dizzy with joy. A few days later, this happened-


Now you can see from the close-up that there are some mistakes where the paint leaked past the stencil but that's because I kept lifting it up to see what it looked like. I'm really an excited kid at heart especially when I get to make things. Don't worry it won't happen to you if you're patient. I'll stop blabbing now and get to it:

You Will Need:


  • Fabric of your choosing -you can choose any colour. I liked cotton because it's super easy to use, durable and doesn't require special care to wash in case it gets stained.
  • Acrylic/Fabric paint in a colour you like. (I got mine at Liguanea Drug & Garden you can pick yours up here)
  • Stencil (I made mine using cartridge paper but you can download one from the internet and print it.)
  • Sponge brush or rag
  • Tape
  • Scissors

Method

  1. Measure the cushions you want to cover. Don't assume they are perfectly square. Determine whether you will need a lining for your fabric - you don't want to cover over the original fabric only to have it show through. If you need a lining you will want to double the fabric so just double your measurements.
  2. Cut the fabric for the front of the cushions only (you'll see why later) and lay them out on a flat surface, tape the edges down so they don't move and make sure they are completely flat without any ripples.
  3. Print/Make your stencil. I wanted a quatrefoil print but I couldn't bother to scale, size and print a pattern for my stencil. I kind of just figured out that I could use a square and half circles to create a similar effect so I drew that onto cartridge paper and then cut it out using an art knife.) It's far easier to print to scale I guess, but my creative side of my brain was making the math side of my brain lazy.
  4. Lay down your stencil using tape and with a pencil mark the edge/bottom of your stencil so you will know where the lay it down for the next line and have even spacing.
  5. Pour out your paint onto a plate and wet your foam brush or an old rag. It shouldn't be dripping but it needs to be moist so that it can get into the fabric properly. I was going for an almost tie-dyed effect so I didn't want it to be super clean lines but sort of faded like vintage tapestry especially since the paint was metallic.. If you want cleaner lines use the sponge brush, and for a more organic effect use cloth and dab rather than swipe on the paint.
  6. Remove the stencil carefully and keep going until all your fabric pieces are covered. You can vary the way you apply the stencil or you can stick to one method. Just get creative!
  7. Let it dry and press it so the paint is locked into the fabric

Sewing Instructions

DISCLAIMER: I did not use a pattern, I would rate myself as an Intermediate with sewing and I have a machine. This doesn't have to be done with a machine, a firm double backstitch by hand could get the job done but it will take longer.

  1. Not someone who can sew? If you are familiar with fabric glue go ahead and use that. If not, then take your actual cushion, and your newly printed fabric to your dressmaker/tailor. They won't charge you much to stitch them up.
  2. If you do sew, get some upholstery thread - you want this to be durable.
  3. Lay the front of the cushion down and measure the sides again *cut once measure twice*
  4. You will need two pieces for the back. Why? So you can slip the cover off and on to wash it, or to just change it out if you change your mind. The pieces need to overlap - so use the following example as a guide:
    1. If your front piece measures 20 x 20 then cut Piece A to measure 15 x 20 and the Piece B 13 x 20
    2. The overlap needs to be sizable enough to lay flat but not too small because this will cause it to gape
    3. Hem one 20 inch side of Piece A then a 20 inch side of Piece B
  5. Attach the un-hemmed side Piece A to the front matching the sides that measure the same together right sides facing each other. (The 20 inch side to the other 20 inch side) Then do the same with Piece B.
  6. Then lay Piece A over Piece B and sew the top and bottom to the front piece.
  7. Turn everything to the right side and check to see that everything is firmly in place. Iron and slip your cushion inside
THE END

This does not take long, but I got excited and finished one piece and stared at it for a couple days before completing the others. I also wanted to make sure I liked it enough and now I'm really happy with it. 

Will you be trying this? If you do, please tag me in your photo or tag #decoratewithjane so I can feature you on this blog. Check out my Instagram and Facebook page to stay up to date with what I'm doing.

Till next time,
*Jane


Monday, June 30, 2014

Review: L'Oreal Evercreme Deep Nourishing Masque


By now, we should all be aware that in order to get and maintain healthy hair we need to use a deep conditioner. No? Are you still just shampooing and conditioning? Sort it out ladies, sort it out!

Now, there is more than a fair share of deep conditioners on the shelves currently and you may be confused about which one will work for you. I thought it would be useful to review a couple deep conditioners I have tried individually and then do a side-by-side comparison for you. 

The one I am currently loving is the L'Oreal Evercreme Deep Nourishing Masque that I picked up from Megamart for about $800 JMD about two months ago. Here are my thoughts:

Packaging

This comes in a standard tub/pot with a twist off lid. It's a pretty reflective gold container with about 5 fluid ounces of product inside. It's not so big that it can't fit on the ledge of the bath but it's not a small tub either. There are no grips on the container so you will definitely need to grip this properly to prevent it from scatting all over the tub *because this so didn't happen to me*. So this is pretty standard packaging, nothing out of whack. 

Pricing

This is on the lower end of the spectrum when it comes on to deep conditioners. I've seen similar products with similar ingredients for double the cost so I really like the price tag, It is also affordable enough for you to buy and use at home rather than having to wait for a salon appointment for your hairdresser to use it on you. As I said earlier, I got it for around $800 JMD which is my sweet spot for products. I have seen it elsewhere for up to $1100 JMD though and if you find it online it may run even pricier than that. Don't buy the first tub that you see however because L'Oreal is having a pretty intense campaign in the Caribbean currently so you will find their products in several places. 

Application

If you follow the instructions you should apply this to towel-dried hair after shampooing. You can use a regular conditioner before you use this but I have found that I have better results when I apply it right after shampooing. It is quite a strong scent, and you will most definitely notice it - they were pretty heavy handed with the sniffs. The scent doesn't offend me and it doesn't linger in the same strength as it is when you apply it to your hair so when you uncap it don't freak out, the scent will wash away.
Now this is where this product shines. I have relaxed, coloured hair so this means that I need all the moisture in the world. I usually take two scoops of a deep conditioner and apply to my hair in two parts. This product? Half a scoop served for my whole head - and I have a pretty big head. I started out as I normally did, a little first because I was using it for the first time, applied to the ends of my hair first then worked it into my roots massaging it so my hair would begin to detangle itself. Then I kinda realized that I was massaging my whole head and the product had melted into my hair nicely like some kind of butter. I literally stood in the shower going "Whoa....". I kid you not my friends. It absorbed beautifully without leaving that clammy feeling most conditioners leave on my fingers and I barely had to work it into my hair. Amazing. Full stop.

Results

I left the conditioner in for about twenty minutes in the shower, no heat or cap and when I rinsed it out my hair didn't feel greasy or limp but I could tell immediately that it was considerably softer. Fast forward several hours later, it was still really really really soft, shiny and bouncy. Not only could I not stop touching it, my husband kept playing in my hair too. I think the softness is due to the lack of sulfates in it and to the ceramides. As a brown-haired girl you get pretty excited when your hair looks shiny without much work especially when your hue is more mousey than anything.

I really enjoyed this conditioner and I am praying that they don't change the formula anytime soon. So, would I recommend this? If you follow me on Instagram or you've liked my Facebook page you will know that I already have! Run out and get it, it won't disappoint you. (PS I am convincing my naturalista friend to give it a run and let me know her thoughts, as soon as she does I will let you guys know.) 

((You can see my full haircare routine here and how I grew out my hair from a pixie cut here))

Thanks for reading lovelies!
Till next time,
*Jane


PS - Check out my new boutique for customized jewellery - we ship worldwide! Click here

Wednesday, May 21, 2014

Spring Fashion : Oh So Minty


Mint is in - still. If you have yet to hop on this trend here are three simple ways to incorporate this universally flattering colour into your wardrobe.


Casual

Update this popular pastel by pairing it with graphic prints this season. An aztec print like the one in this picture is flattering and summery and lets the mint shorts work as a neutral in this outfit. This is perfect for you ladies that prefer a more muted take on a colourful look.

Top: Macy's
Shorts: New Kingston Shopping Centre
Belt : Forever 21
Shoes : Sperry Top Siders get yours here
Shades: Aviators - Body Glove
Necklace : Claires


Work Wear

You can wear this colour to work especially if you have a piece in a button up or blouse-y style. This mint piece has subtle polka dots and is on the sheer side, which means wearing a flesh-coloured slip or tank underneath to keep things office-appropriate. A bold print like the zebra print here will perk things up while a grey plaid pencil skirt is chic and sophisticated.The studs on the collar are minimal and not spiky so they don't draw too much attention but still add some edge. The metallic mint caps on the pumps mirror the studs on the collar for a cohesive look.
Top: New Kingston Shopping Centre
Zebra Skirt: Marshalls get similar here
Grey plaid skirt: Marks & Spencers get similar here
Necklace: Namesake JM


Date Night

A lace mint dress screams flirty and girly. Give it some grungy sex appeal by pairing it with a waist-nipping printed jacket, an unusual chunky piece of jewellery and high strappy sandals in shiny patent leather. I like this look because the silhouette is familiar and feminine which is important on a date (men are confused by more fashion-forward silhouettes - they want to know you have curves) but the pieces aren't necessarily what you would grab for first. The tribal vibe of the necklace goes well with the houndstooth print of the jacket because of the similar colours. The black and white are a bold contrast to the pastel but it still works.The deep v-neck of the dress keeps the look from being too bulky and the heels make everything sexier.
Dress: Macys get similar here
Jacket : vintage
Heels : Steve Madden
Necklace: gifted
Clutch : thrifted


Are you into the mint trend? How are you styling your pieces for this spring/summer season? Leave me a comment and let me know.

Peace out lovelies
*Jane

Tuesday, May 6, 2014

Five Met Gala Beauty Looks You Should Try Now!

If you pay attention to the fashion/entertainment world any at all then you would know that the Metropolitan Costume Gala Ball was last night. What the heck is the Met Gala? Well wikipedia gives the simplest description:
The Met Gala, formally called the Costume Institute Gala and also known as the Met Ball, is an annual fundraising gala for the benefit of the Metropolitan Museum of Art's Costume Institute. It also serves as an opening celebration for the institute's annual fashion exhibit.[1][2] It is widely regarded as one of the most exclusive social events in New York and one of the biggest fundraising nights of the city with a reported nine million dollars raised in 2013.[3][4][5] The affair, attended by personalities from the arts, fashion and entertainment, has been held at the Met since 1971 and is considered to be the fashion industry's premier annual red carpet event.[6][7][2]
Anna Wintour, Vogue editor-in-chief and chair of the event since 1995, oversees both the benefit committee and the guest list, withVogue staffers helping assemble the list of invitees.[8] Each year the event has a theme, and includes a cocktail hour and a formal dinner.[9][10] The gathering rivals the West Coast's Vanity Fair Oscar Party, which is said to have more "star power" but less fashion panache.[11] In 2014, the ticket costs $25,000 for each guest.[12][8]
 So basically, its the celebrities' best chance to get dolled up and look super fancy. While everyone was paying attention to what dresses and tuxes were being worn, I was zooming in for beauty looks that I could replicate. Here are five of my favourite looks that I think are universally flattering and that everyone should try at least once.

 Why it's pretty: This look stems around a statemnt lip colour that's beautiful because of it's depth. It takes a modern vibe with its balance between brown and red and the fact that she paired it with super subtle eyes, lashes and brows. The creamy, almost velvet complexion and the soft contour and higlighting kept it feminine and approachable not goth.

Why you should try it: You don't need to go out and buy a new lipstick when there are a million lip pencils in this shade. Blot your lips out with a creamy concealer to ensure smooth application and layer on the pencil with a lip brush. Finish with a dab of clear lip gloss and swipe your lids with a shimmery colour close to your skin tone to mimic her eye look. Skip fake lashes and just have a go at mascara and a thin line of black liner on the top lashes. Use a shimmery light gold on the bottom lids to balance the look and a light sweep of a raisin blush on your cheeks can act as bronzer and blush all in one go.


Why it's pretty: Um, hello? This is gorgeous and freshfaced and summery and glamorous all at once. A more subtle orangey-peachy lip pairs well with the gorgeous colour of her dress and lets her lashes and brows stand out in a natural beauty kind of way.

Why you should try it: I will be trying this out immediately. The colour on her lips remind me of the texture of the NARS pencil but it can be copied with lipstick, and powder dabbed over it to matte it down a bit. The same tone of peach was used on her cheeks, with flirty lashes and a thick cat eye on her upper lashes. The bottom lash line was lined with an iridescent gold liner (trend alert!). The foundation was on the sheer side  and what looks to be a cream highlighter or even diffuser was used sparingly in her inner corners and on the apples of her cheeks. TIP: if you're struggling with finding the right orange toned lip colour for yourself the key is that the lighter you are, the yellower the orange should be, and the darker, the redder the orange. 


 Why it's pretty: This is a fresh way of approaching an old staple. Brown smokey eyes is the sultrier sister to the original  smokey eyes, but the layer of glitter over it is a young way to liven up an old faithful

Why you should try it: If you're just about tired of doing a smokey eye but are absolutely in love with the way it makes your eyes stand out, then this is your refresher. Blend a chocolate and burgundy cream eyeshadow across your lids and under your bottom lashline, winging it out along your outer corners. Then dip into your shimmer and pat it across the lid and under the eyes, avoiding the outer colours where you need more depth. Line the top water line with a dark brown, and the bottom with a bronze liner. Then use a defining and lengthening mascara to pull your lashes out and up. Finish off with strong brows, a swipe of peach blush and a lipstain in a sorbet shade.


Why it's pretty: This is an all-time classic look, red lips and big lashes. It got a punk rock flavour with the gold leaf streak along her part but the fact is a red lip is always glamorous and classically pretty

Why you should try it: If you haven't sussed out a red lip colour that looks great on you yet, shame on you! Red is like high heels for your lips, if done properly there are few things more alluring. So pucker up and give your lips some glamour. Your lashes don't need to be so bold, you can skip the strip and go for two coats of a volumizing mascara or, try clusters instead of a strip. Pair it with winged liner on the top lids, a conversation starting ear cuff and sculpted eyebrows and you will have Rita Ora's look down to a tee.


Why it's pretty: This look screams spring/summer with the bright pastels paired up. Try to ignore the headband, I would actually pair this look with something less colourful than what Lupita wore, but the eyes and lips are too gorgeous to pass by. 

Why you should try it: If you are going to wear a bright colour on your lids, this is a fail safe way to wear it. Apply it messily around your eyes like an eyeliner and then go through and blend it outwards. Finish with a light sweep of blush (I would have chosen a sheerer blush than what she is wearing) and layer this pinky shade of bronze with a light swipe of a sheer purple gloss for a pretty effect.


I will be trying out these looks in the upcoming weeks. If you try any of them, post a picture and tag me #janekoysen so I can like it!

Till next time lovelies,
*Jane


Monday, April 28, 2014

Review : Biore 4-in-1 Detoxifying Cleanser

Guys, I finally found it. The last missing piece to a skincare routine that completely works for me. Finally! My skin has calmed down so much and I am getting daily compliments on it from random strangers. Love it!

I blogged earlier in the year that I tried and fell in love with the Olay ProX face brush and that it has made a significant difference in controlling my breakouts and improving my skin texture - that was great but this, this is my skin soulmate.


My skin can be really sensitive and it has a hard time absorbing topical products resulting in clogged pores. Add tropical heat to that and you can count on sweat, smoke and other pollutants throughout the day. So whilst I was cleansing with the brush, I also needed something a little deeper to help encourage my pores to open up and get rid of all the toxins and extra things my skin was holding onto. Those tiny little bumps that signify clogged pores and the whiteheads that often accompany them have now disappeared and I am as happy as a clam.


Let's get into the review now shall we?


Packaging


The cleanser is currently available in two different packages. The only difference is on the label but the name is still the same. It is is a white opaque bottle with a blue wide spout for pumping as it is a foaming cleanser. There is also, thankfully, a clear cap to protect the spout and to catch any product that may try to escape. You get 6.7 Fl Oz in the bottle, which is a lot more than I normally get in a bottle. The pump and the spout are an excellent pairing and you only need one pump for your entire face. I haven't experienced any spillage or leaking and I have traveled with this cleanser more than once so I think the bottle is pretty sturdy. You can also pretty much pump from any position, upside down, right side up etc. The only improvement that could be made is to have little grips or indentations on the side of the bottle because it does tend to slip if you grab for it with wet fingers.

Use/Application


I wet my entire face with water, use one pump and apply this with my fingers onto my face and neck. There is a slight cooling sensation - nothing to irritate you but you do notice it. It foams up pretty well and I rub it in lightly with my fingers so I can make sure that it gets everywhere. The foam doesn't get out of control and it does a great job of staying put on your face. I rinse it off with cold water thoroughly and then go onto the next step in my routine.

This removes makeup, sunscreen and any oils I may have applied to my face in one quick step and despite the fact that it is foaming my skin never feels tight after I wash my face. I have not experienced any irritation whatsoever or any product buildup along my hairline, ears or neck which can happen if your skin is easily irritated or sensitive. It has a barely there smell and doesn't leave behind residue or scent or that nasty white cast that some cleansers can. I use this with my cleansing brush most nights but in the morning I use it with my fingers so don't feel that you need to have a brush for this to work for you I just like the feeling of knowing I got a good deep clean in one step especially if I am removing makeup.

I can't think of anything Biore needs to do to improve the formula of this product at all.

Pricing


This was one of the cheaper products on the shelf coming in at about $800 JMD (under $1000) and it was more product than a lot of other cleansers. I bought this back in February when my other face wash finished and I think I'm barely halfway through the bottle. I love that you get so much product but I know that as soon as this is finished I will be going out and buying this again. I've already had to stop myself from stocking up and just hoarding it. In fact, I'm getting anxious just worrying that I won't be able to find it again *deep breath*  but I will practice self control...I think. 

This is worth your money, and the fact that it is affordable makes it an even sweeter deal. Don't hem and haw, just buy it you will like it.

Results


Fantastic. Clear skin, unclogged pores, great smooth texture, even complexion, and it has helped with balancing and controlling oil. I really really like this. I have the old packaging and I sincerely hope the formula has not changed with the new packaging. The blurb reads thus:
I can't say that anything that it claims to do is false or doesn't ring true for me. They've done a wonderful job with this product and Biore, you guys should be applauded. I did not even know you guys did anything other than pore strips! Bravo!

Final Thoughts


It's been quite a few weeks and I am still in love. I saw results within the first two weeks of using this and I continue to see results. My skin has returned to its former glory and dare I say, is even better than it used to look. I will be buying this again and again and again, I've already recommended it to a bunch of people and I will be trying out other Biore products I see on the shelf now.

Till next time lovelies, and remember if you have any questions you can always leave me a comment or get me on Facebook. 

*Jane

Tuesday, April 22, 2014

Janekoysen 100 Posts Giveaway Winner Announced!

If you entered my contest way back in November, you may have wondered what happened to the giveaway. No, I didn't forget but I did have some trouble with sorting out the entries. I have now contacted the winner and received a response and the prize has been sent out to her. I battled with whether or not I would go into the details  of the reason behind the delay, but I think it may be best not to mar my first contest with the ill of what took place. So, onwards and upwards! It was an exciting post and I hope you guys enjoyed the little give back as much as I enjoyed hosting it. SO, without further ado:

The winner is:

AVISMAUREEN


CONGRATS!!!!!

Thanks to everyone who participated and for those who didn't win , don't be too disappointed because there will be more giveaways in the future.

I just wrapped a huge production and am back on my posting schedule so you can look forward to new reviews, tips and tricks and guides coming up starting this week. I hope you all enjoyed the Easter and got some well-needed rest.

Till next time lovelies,
*Jane

Tuesday, February 25, 2014

DIY Style - Contrasting Sleeve Blazer

I am a jacket fiend, despite the fact that I live in tropical weather. Recently I acquired a mixed media jacket with faux leather contrasting sleeves and I cannot get enough of it. This inspired me to remix one ( or a few *ahem) of my older jackets to spruce them up and make them a little more trendy. The DIY is simple and you will not need a sewing machine so long as you are comfortable executing a backstitch. If you are completely clueless when it comes onto sewing then you can have your tailor or your dressmaker do this for you and it will still cost WAY less than buying a new jacket.

Contrast sleeve jackets are those jackets with a different colour or texture sleeve than the rest of the jacket. It adds a stylish element to what you're wearing with a modern edge and I am in love with the style. This DIY allows you to dip your toe in without committing because you can always switch the sleeves back so you still have a classic blazer. I really like this - Can you tell?

Okay so here we go!

Step One:
Choose two jackets of a similar style and length. Decide of the two, which jacket will be the shell and which jacket you will use the sleeves from. In the instance below, I am using my white jacket (Charlotte Russe, similar here) as the shell and the faux leather jacket (Wet Seal, similar here) as the sleeves for contrast.


Step Two:
Turn the jackets inside out and with a seam ripper, sharpened pencil, tweezer or a pin remove the lining around the seam where the sleeve is joined to the jacket. Once this is done then remove the stitching around the seam that attaches the sleeve to the jacket. Make sure you do this carefully and you do not use a pair of scissors in case you want to reattach the sleeve in the future. If you are working with more delicate fabrics like sequins, faux leather or satin you need to go very slowly and pull one stitch at a time so you don't rip the fabric.


Step Three:
Once both jackets have been de-sleeved, make a note of which sleeve is the right and left and what is the front and back of the sleeve. If you look closely you will usually see a seam going up the underside of the sleeve. This section is the part that comes up to the middle of your armpits, this is the first point of contact. Turn your shell (the part of the jacket that now looks like a vest) inside out and look for stitching or a seam that will line up with that long seam on the sleeve that goes up to your armpit - this is where you will make the first stitch.
Now take the sleeve (do not turn it inside out) and slip it inside the vest (which has been turned inside out) and through the arm hole. Line up the seams and pin the jacket at the following places: 

  • that long armpit seam
  • the top of the sleeve where it attaches to the shoulder (usually this section will be the pointiest section - pull out your sleeve and you will see)
  • the half way points on each side between the top/shoulder and the armpit seam


Step Four
Do a preliminary stitch with your needle and thread like a running stitch or a base stitch (the standard in and out), remove the pins and try it on to make sure you've done it up properly and correct any bunching or gaps with your final stitch. If you are sewing by hand then I recommend you use a backstitch with doubled thread and go it over twice if your material is heavier like the faux leather I was using.


Et Voila! You're done!!!! Remember as long as you're careful when you're pulling out the stitches you can always just continue to swap out your sleeves. I hope you enjoy this one lovelies, and tag/mention me on Instagram in your DIY pics of your jackets so I can add them to a collage. Just tag #janekoysen.

Till later,
*Jane


Wednesday, February 12, 2014

Five Easy DIY Valentine's Day Ideas

Hey lovelies! 

V-Day is around the corner, why not let your Valentine know that they are special enough for you to take the time to create something with your own hands?

Here are five ideas you can try out if you're still scratching your head on what to do for Valentine's Day:


DIY Love Note Bouquet


If expressing yourself verbally is not something you're good at - this is a way you can get away with using quotes. Here are the instructions:

1. Depending on how lush you want the bouquet to be, print out between 20-40 love quotes on three different shades of paper and cut into rectangular strips of paper measuring 5" horizontally and 2" vertically. (This will be the bud of the flower)

2. Attach one end of the paper to the end of a pencil, a kebab stick or a sturdy straw using glue and wait for it to dry. (This will be your stem) You can go the extra mile by spray painting the stem green if you wish.

3. Arrange into the three different groups by shade. Starting with the darkest/brightest shade roll the strip of paper up so it looks like a spiral. They will begin to look like flowers.

4. Decorate your bouquet container/vase using either contact paper or tissue paper and glue and let dry. You can use a mason jar, glass or cup.

5. Measure your stems against a ruler. Cut two inches off the stems with the lightest coloured paper roses; one inch off the medium and leave the darkest intact.

6. Arrange the colours in your container starting with the darkest colours. Add the medium colour to the outside then add the lightest colours to the outside of the remaining flowers. You will notice three different levels and the three different colours from all angles. 

Play around with it till you are satisfied and create a little tag with his/her name on it. Watch your sweetheart smile as he/she unrolls each sweet note.


Cupcake Surprise

If you're keeping it low key but you still want to do something for your love this a good idea.

Bake  or Buy a dozen cupcakes for your sweetheart and some frosting and sprinkles. Cut the top off and cut out a heart shape. Spread frosting on the opened section and add your sprinkles then gently squeeze back on the top to have your frosting and sprinkles peek out. No frosting around and not enough time? Try using whip cream, chocolate syrup, Nutella, a favourite jam or thin slices of fruit.

Need a video demo? Watch this video by Leaf TV:


DIY Video Card


Pull ten or so pictures of the two of you together and a song that means something special to the both of you into a Windows Movie Maker project or Slide show software. Film a simple intro with your phone or webcam saying Happy Valentine's Day explaining that you put something together to let him/her know how much they mean to you. End the video with a special message like a scripture, quote or if you have dinner planned the time and place you want to meet them for a special dinner.


Coupon Book/ DIY Sexy Card Game


If your husband or wife has made it very clear that they are expecting some extra spicy loving for Valentine's Day then don't let them down.

Coupon Book: This idea has been around for a little while but the idea is to spice it up a little. For example, instead of just giving a coupon to wash his car for him - give a coupon to wash the car in a white shirt sans bra or for him to give you a swedish massage wearing only baby oil. *ahem Did it just get extra hot in here?*  But I'm sure you get the idea. Get creative luvvies! I believe in you! Print out about ten of them, punch a hole in it and attach everything with ribbon or... a sexy piece of lingerie.

Sexy Card Game:  This super easy DIY game is fun and hot. You can click here to print out these images to make things easy or you can cut up some cartridge paper into card size and write on the words. The game is easy - you divide the cards into three stacks (body part, action, giver/receiver) and each person takes a card from each stack. Then just take turns doing what your card says. Have fun!!! *wink*


Framed Love Letter


Is your sweetheart always buried in a book? Framed words will mean a lot to them for a V-Day gift. Dig deep and write a long love letter pouring out to them what they mean to you then print it out on a watermark of the two of you and insert it into a picture frame. Watch his/her swoon as they read your love note over and over again. (Just remember to keep it tasteful).


And that's it! Hope you guys have fun and enjoy making someone feel special.

Till later,
*Jane

Monday, February 10, 2014

The ULTIMATE Valentine's Day Gift Guide for Him & Her

Okay lovelies, Valentine's Day is around the corner and if you're feeling the pressure I'm here to help you out so can let your special someone know in an obvious way that you care. 

This is a gift guide which will require you to spend some money- but these items start from $800 and top off at $9,200. Most things are click-able but if you have any trouble finding anything you can message me or leave a comment. So, let's get into it!
Music Lover


HIM
HER
Wireless speaker ; Mixed CD/Playlist of his favourite love songs (tip : sneak it into his car or onto his phone the night before Valentine’s Day); Subscription to Beats Music ; Book Studio time for him
Mixed CD with her favourite love tunes; Bathroom waterproof Speaker; Subscription to Beats Music


Gym Rat


HIM
HER
Over-the-ear earphones; gift certificate to GNC or other health store to stock up on protein powder, renewal of Gym membership
Subscription to online active-wear store; Victoria Secret fitness gift certificate; fitness tracker; new girlie gym bag; buy her classes at a pilates studio; Yoga mat with her monogrammed initials


Fashion Lover


HIM
HER
Subscription to GQ  magazine;
Consultation with Spencers Tailoring for a new suit or amp up his boardroom swag with a set of new ties, pocket squares and socks
Subscription to Magazine – Vogue, W, Marie Claire
Consultation with designer – Ayanna Dixon for a dress (instead of trying to buy her one)


Corporate Cutie


HIM
HER
Monogrammed pen and business card holder to amp up his corporate swag
Monogrammed/ engraved leather/ faux leather day planner. ( bonus points if you pencil in the days you want to take her on dates or you want reserved as “Us Days”)


Traditionalist


HIM
HER
Take HIM on a date. Pick him up, you drive, you make the reservations, you pay, you sweep him off his feet.
Get him tickets to see a sport he enjoys – boxing, football, basketball,  or get him his favourite player's jersey; pay for a subscription to SportsMAx plus, NFL tv whatever he likes on cable
Flower Lover – Have a single flower sent to her every hour for fourteen hours on Valentine’s Day – attach a note to each flower so she can piece it together;
 A Teddy-bear with a special love message – spritz it with your cologne so she can cuddle with it at night; Pop up V-day card from S@ssy Pop up Creations


Natural Noob


HIM
HER
Book a Trip to Hollywell and take a hike or go on a Nature Walk at the Flower Farm and Botanical Gardens in St. Mary; Get him a Man's Wilderness kit
Candles from Starfish Oils; Luxe Spa set from JenCare ; Get her a gift set from Earth Elements


Bling Beaux


HIM
HER
Cuff links – engraved or get unique ones from Peace-is-of-Bianca; Amp up his bling by buying new bands for his current favourite watch or get him an inscribed leather watch box to store & display his collection
Matching watches – his & her watches – have half a heart engraved on the back of the watches with each other’s initials in it; Jewellery – anything from Peace-is –of Bianca, or E11ven Collections, Pandora Bracelet, Engrave a bracelet or monogrammed necklace.


Gadget Guru


HIM
HER
Silicone blue tooth keyboard; Video game – the newer version of his current fave or the update of his childhood fave
Silicone blue tooth keyboard; Digital photo frame – fill it with pictures of the two of you and sweet messages from you to her like lyrics of a song you both love and what you love about her etc


Movie Maven

HIM
HER
Palace Amusement Movie card or Netflix subscription
Box set of her favourite romantic movies (bonus points if you look up some of the best lines from the movie, write them out and dedicate it to her)


Foodie


HIM
HER
Cooking class with a pro chef like Bryan Lumley; Pop up Gourmet Jamaica card (lets you eat at your favourite restaurants at special rates)
Chocolate dipped strawberries, luxe chocolates from Chocolate Dreams; Edible arrangements; Couples cooking class


Entertainer

HIM
HER
Engraved Shot glasses/ Martini Shaker set for your guy to show off on Dominoes/Poker Night  (bonus points if you cook him dinner, dress up like a bartender and make and serve his fave drink)
Handpainted stemware or glassware in her favourite colours show you’re thoughtful. (Bonus points if you prepare something and serve something in them)


Skin-timate Souls

HIM
HER
Shave and Cleanse kit – Dove Care for Men is affordable and effective.  Clean or replace his shaver with a newer version – include the batteries ;
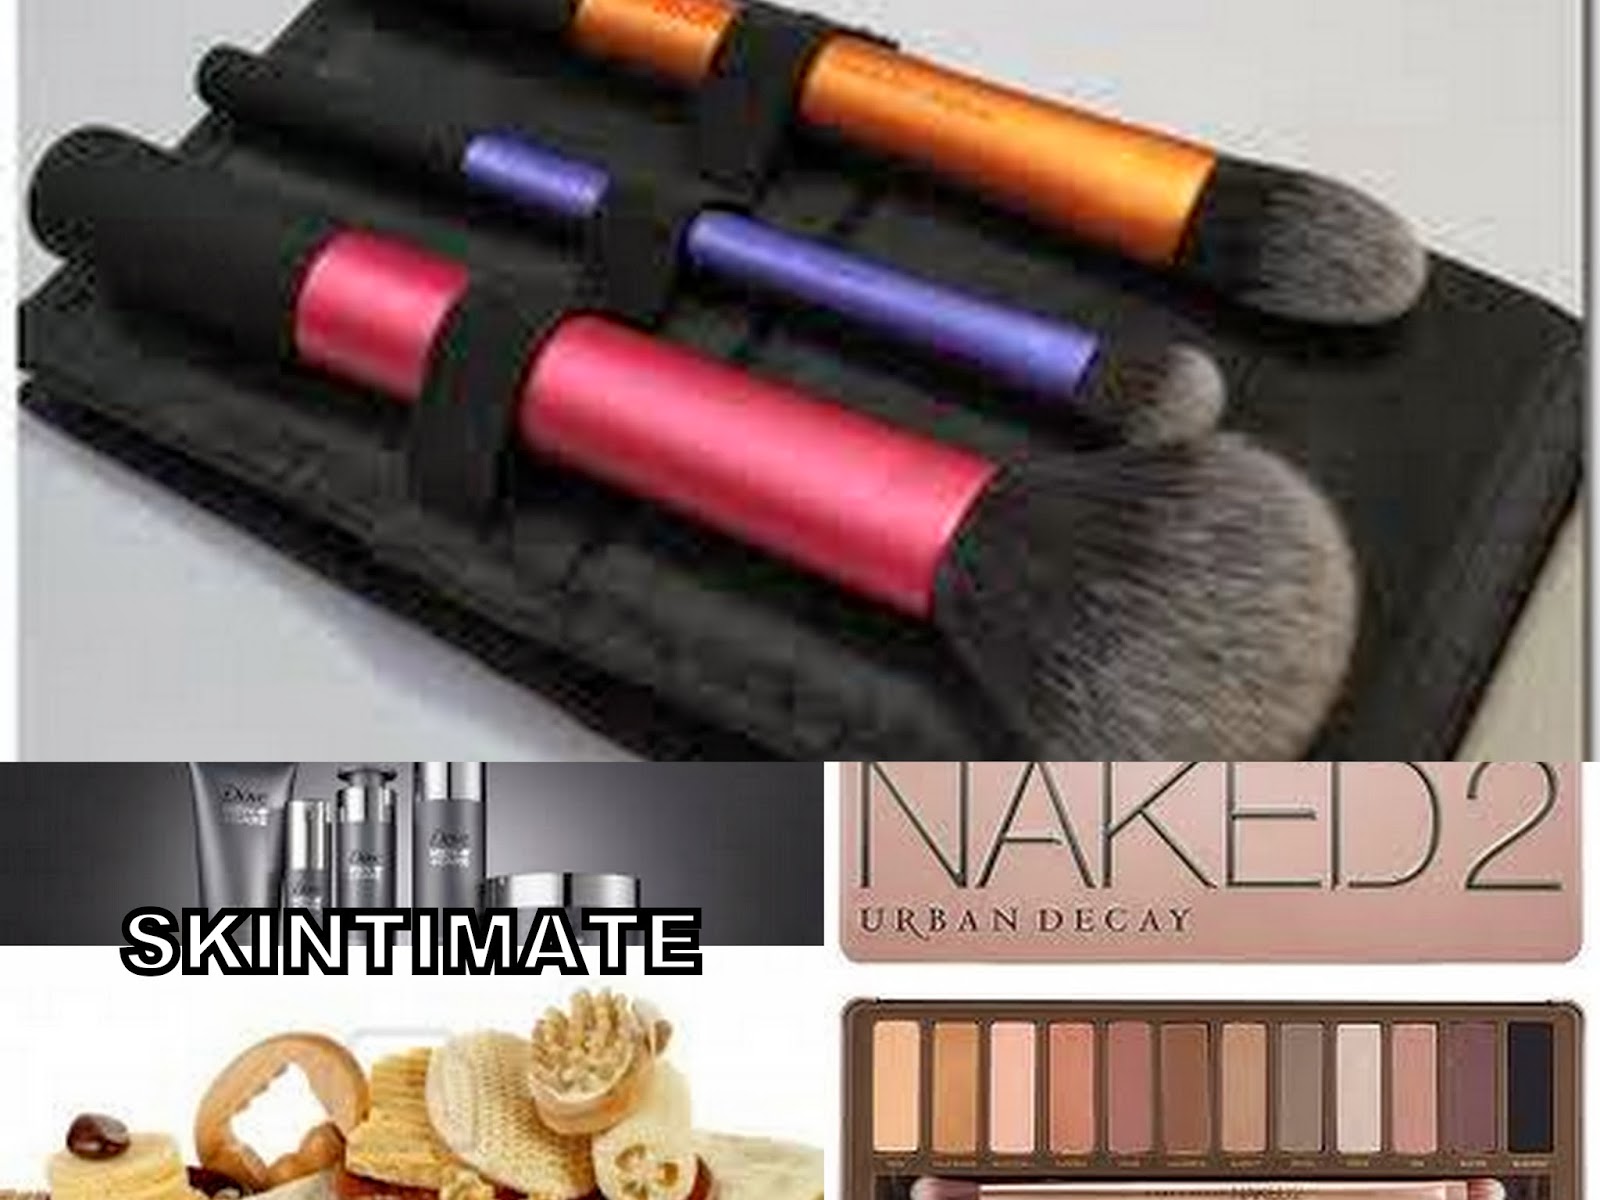
Real techniques brush set or Naked 1,2 or 3 Palette; Makeup Bag from ASD


Hopefully you've gotten some good ideas on what to buy for your significant other this Valentine's Day. Remember you can get anything but a personal touch will be what matters. Always write something endearing and attach to your gift. It doesn't have to be your own words but you do need to mean them.

Tomorrow I will be listing some DIY gfts and some ideas that require a little craftiness but very little money to make your special someone swoon.

Till next time lovies!
*Jane